March 6, 2025
Streamline Revit Workflows with Prevu3D RealityConnect
RealityConnect™ for Revit: Simplify As-Built Modeling with Seamless Reality Capture Integration
Modeling with reality capture data in Revit can be challenging, especially when handling complex point clouds and large meshes. Prevu3D’s RealityConnect for Revit plugin simplifies this process by enabling seamless synchronization between reality capture data and Revit. With 3D assets now in Revit, you can begin the As-Built Revit Family Creation process or refine imported elements—what you see in reality, you can bring into your Revit family in just a few clicks. Reduce the complexity of reverse engineering and optimize your workflow with a more efficient solution.
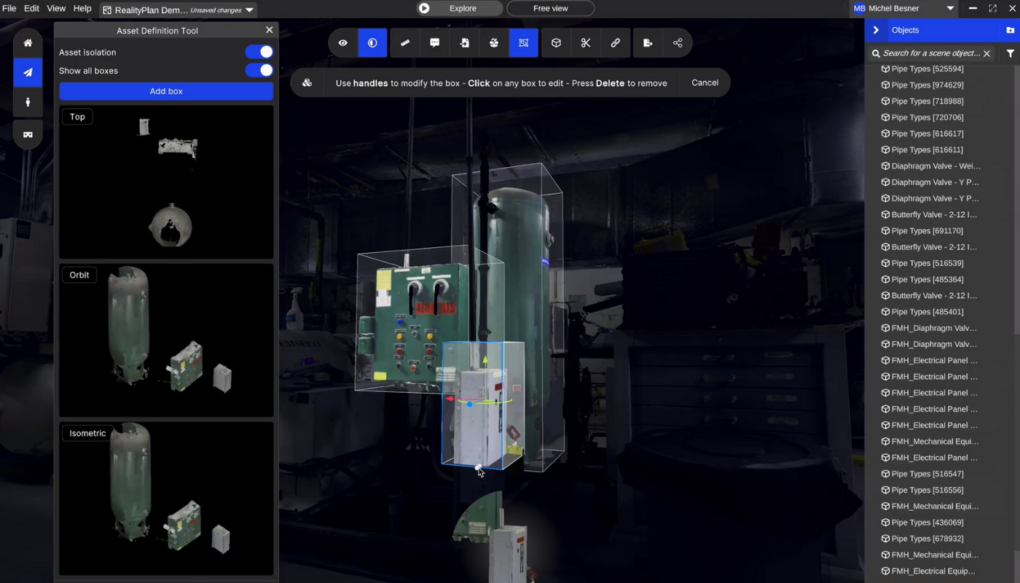
Step 1: Isolating Specific Assets for Revit/BIM Modeling
When working with a 3D scan model, isolating key assets for CAD modeling is crucial. RealityAsset Creation Tools in Prevu3D streamline this process with:
The AI Magic Wand Tool for quick selection of key elements.
The Bounding Box Tool to refine asset selection for accuracy.
The Turntable Tool for easy inspection and adjustments before integration into CAD workflows.
Step 2: Sync Your Data with RealityConnect for Revit
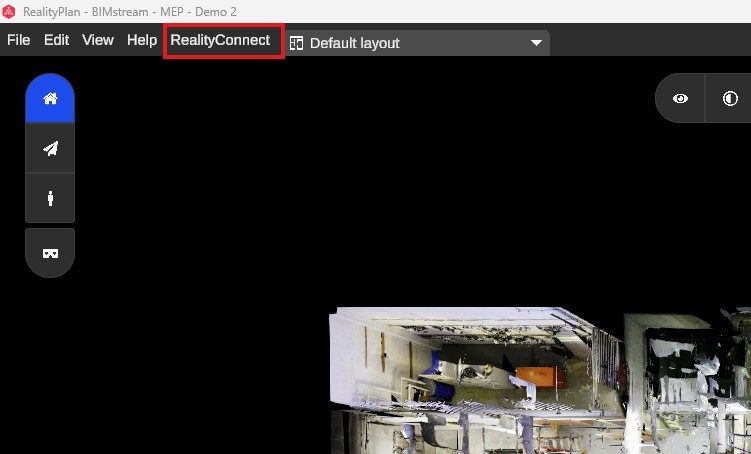
Ensure the RealityConnect plugin is installed in Revit before proceeding. Start the connector in RealityPlan to establish a link between Prevu3D and Revit. Using the Sync Scan button, seamlessly import your point cloud or mesh data into Revit without complex manual imports.
Traditionally, this workflow required Autodesk Recap to process point clouds before importing them into Revit. RealityConnect eliminates this step, saving time and simplifying the process.
Step 3: Importing Point Cloud Data and Mesh Sections
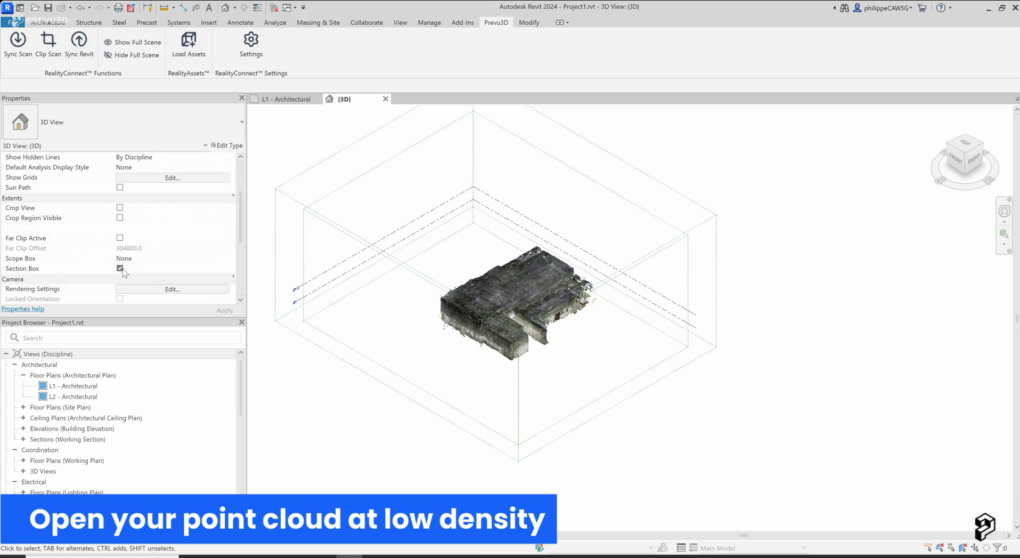
RealityConnect streamlines the handling of large point cloud datasets and meshes, avoiding unnecessary file conversions and data processing.
Efficient Point Cloud Management
Traditionally, managing large point clouds required extensive processing. RealityConnect simplifies this by:
Allowing low-resolution previews for quick navigation.
Enabling high-resolution clipping of specific areas as needed.
Optimizing performance by controlling point cloud density.
Seamless Mesh Integration
Revit struggles with large meshes, but RealityConnect improves usability by:
Loading low-resolution overviews while enabling high-detail clipping where required.
Preserving textures and materials during import.
Step 4: Import 3D Assets into Revit
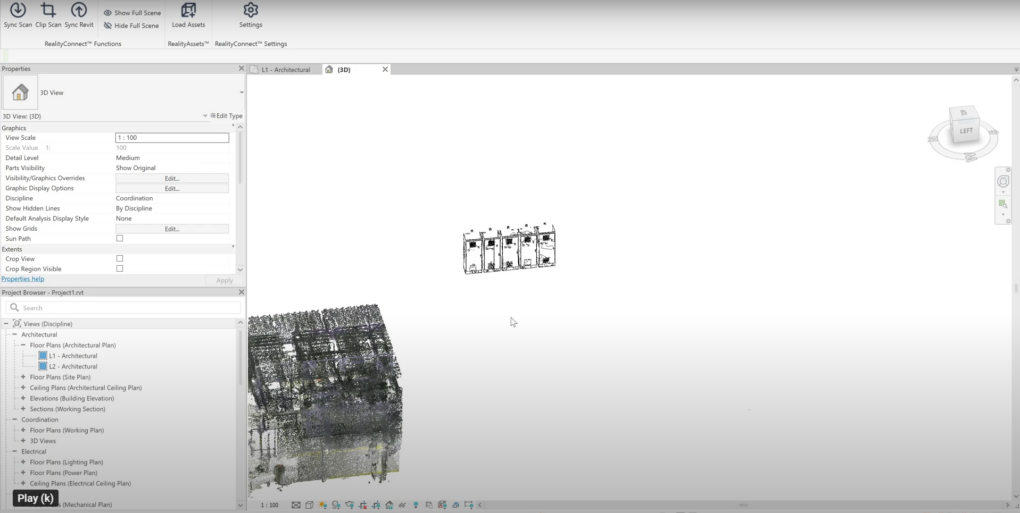
Use the Load Asset button in RealityConnect to import RealityAssets from your RealityPlan layout while controlling mesh density for optimal performance. By importing only the necessary sections, you reduce system load and improve efficiency.
Additionally, you can import the entire project as a mesh reference, providing a visual guide for modeling and alignment within Revit without overwhelming your workflow with excess data.
Step 5: Perform Back Modeling & Make Direct Edits in Revit
With RealityAssets now in Revit, you can begin the As-Built Revit Family Creation process or refine imported elements. Whether modifying structures, aligning designs, or integrating new components, RealityConnect ensures an intuitive and efficient workflow with visual and spatial context.
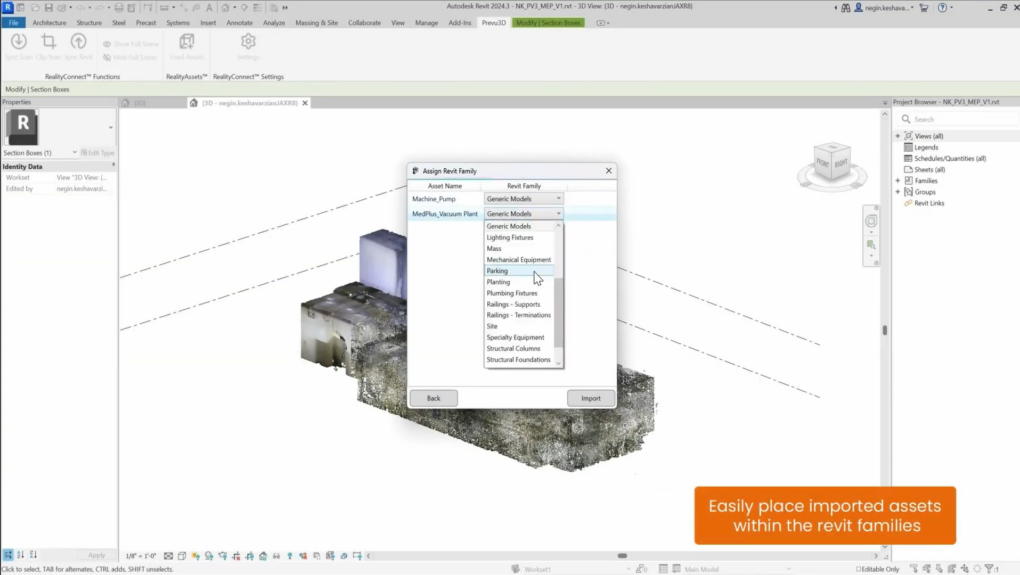
Imported meshes are automatically recognized as Revit families (.rfa), allowing you to change their category for future clash detection. You can use the Prevu3D mesh in Revit to extract dimensions, create your Revit family, and seamlessly integrate it into your project—or back into Prevu3D for further use.
Get the Plugin!
With RealityConnect for Revit, you can streamline back modeling workflows, reduce rework, and enhance design accuracy with minimal effort. Want to see it in action?

